
Getting Started
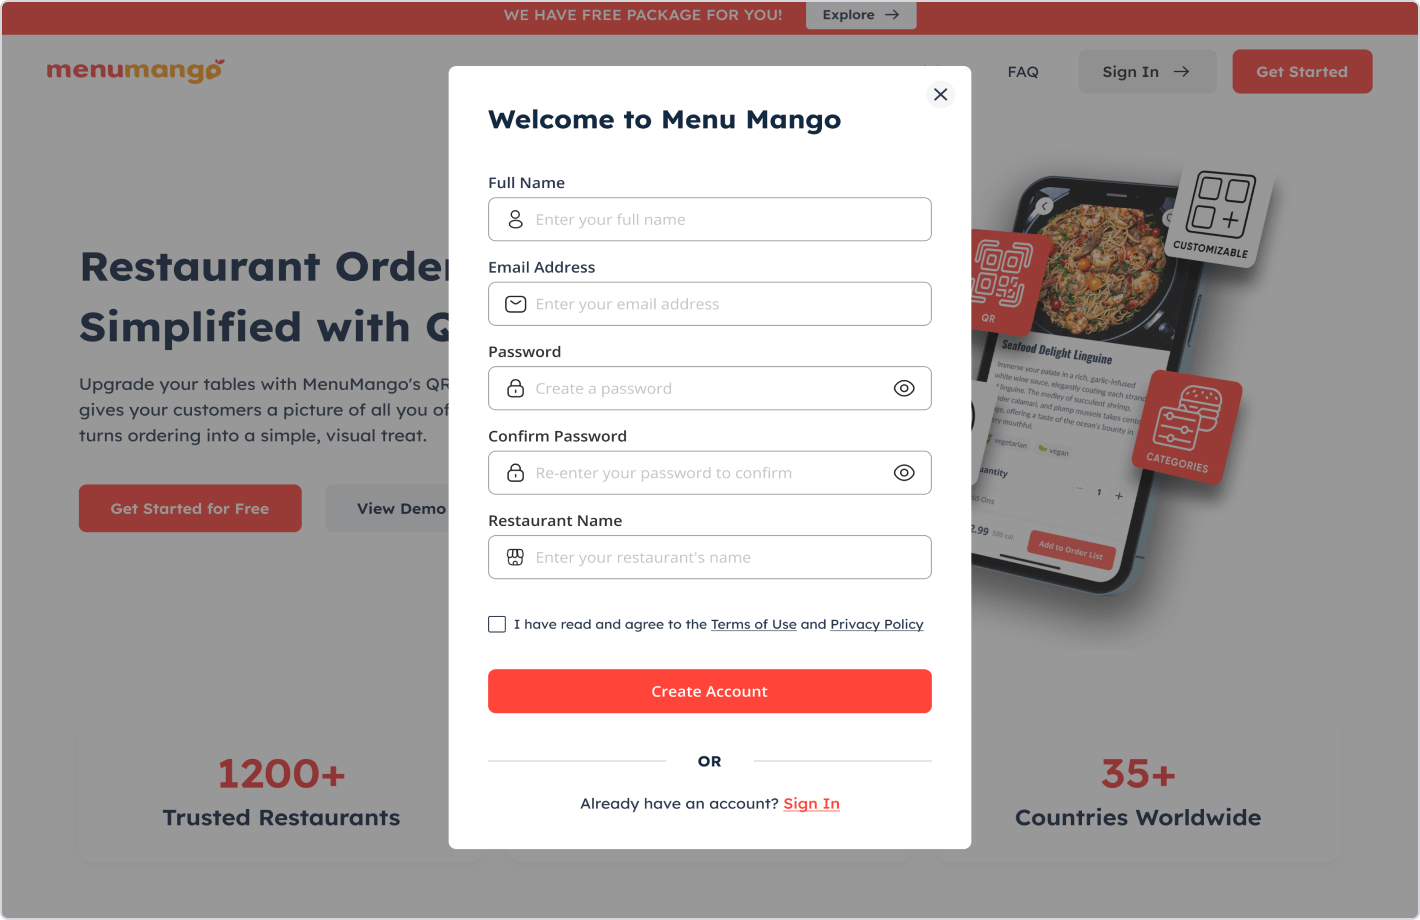
To begin, visit the MenuMango homepage and look for the "Get Started" button, typically located in the top right corner of the page. Clicking on this button will initiate the setup process, guiding you through the necessary steps to create your MenuMango account. You will be prompted to provide the following information: Full name, restaurant name, email, and password. Once you have entered these details, you will gain access to a wealth of tools designed to streamline your operations and enhance your customers' experience.
Registration Process
After clicking on the "Get Started" button, you'll be seamlessly redirected to the registration page. Here, you'll begin the process of setting up your MenuMango account. This step is important for accessing all the features and functionalities that MenuMango has to offer. As you complete the registration process, you'll gain access to an array of customization options, allowing you to tailor your MenuMango account to suit your specific requirements.
Completing Registration
After clicking "Get Started" and landing on the registration page, it's time to complete the process by providing some essential details. You'll need to enter your name, and email address, and choose a password that you'll use to log in to your MenuMango account.
This step ensures that you have a personalized account through which you can access all the features and benefits of MenuMango. As you finalize your registration, you're on the brink of unleashing the full potential of MenuMango for your business.
Subscription Selection
Upon completing registration, you'll start with our free package. As you grow, consider upgrading to access additional features. Choose from a range of subscription packages tailored to your evolving business needs. Explore options within your MenuMango account and select the plan that best fits your requirements. After completing your registration, you'll kickstart your MenuMango journey, providing you with essential tools to begin enhancing your customer experience immediately.
Within your account, you'll find a variety of options to choose from, allowing you to select the plan that aligns perfectly with your growing requirements.
Personalizing Your Profile
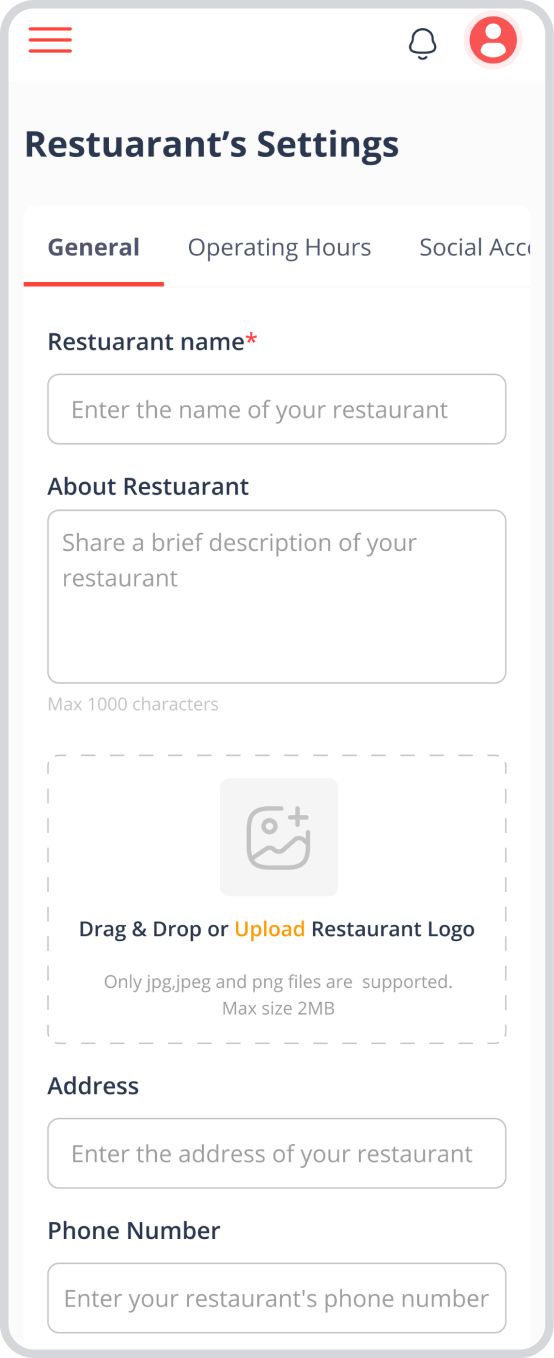
After clicking "Get Started" and accessing your MenuMango account, the next step is to personalize your profile. Input your restaurant's name and provide a brief description that captures the essence of your establishment. This information will help customers understand what sets your restaurant apart and what they can expect from their dining experience. Additionally, upload your restaurant or cafe's logo to give your profile a professional and recognizable touch.
Adding Your Menu
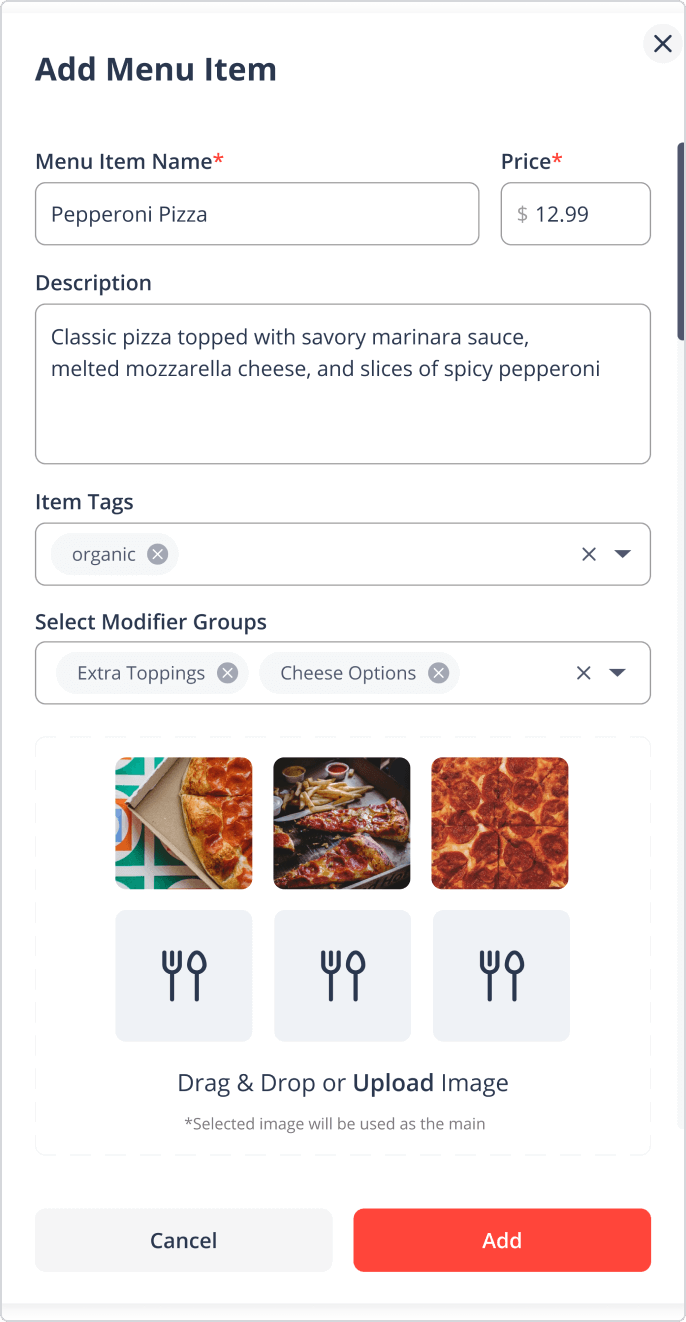
Navigate to the Menu section of your MenuMango account to begin adding your menu items. Simply input the food/drink names and descriptions, then click the "Add" button to include them in your menu.
Explore further by downloading our detailed guide featuring step-by-step instructions.
Adding categories
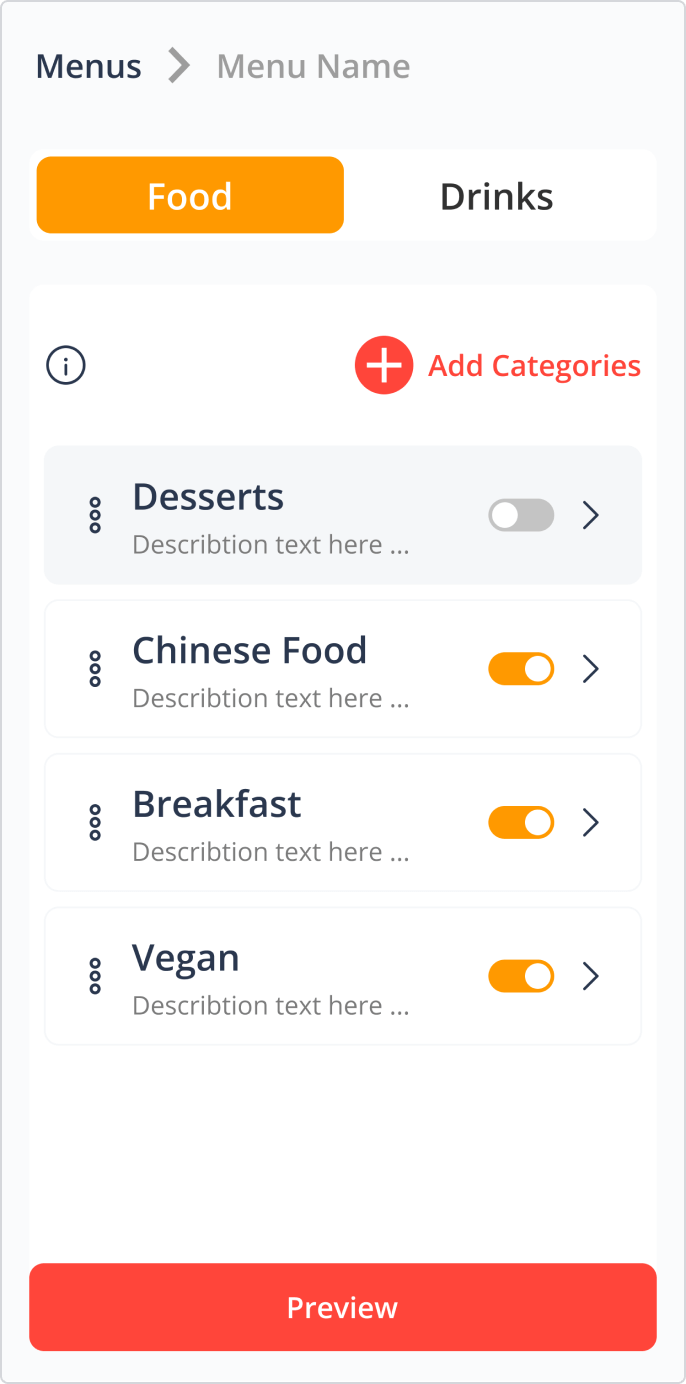
Once your menu is created, it's important to organize it for easier navigation. Click on "Edit Menu" to get started. From there, you can add categories to group your menu items logically.
For instance, you can create categories like appetizers, main courses, desserts, or beverages such as coffee and juice.
Menu Item Management
To populate your menu effectively, specify whether each item is food or a drink. Then, fill in all the necessary details for each item, ensuring accuracy. Once you've entered the required information, save each item to add it to your menu.
This step allows you to efficiently manage your menu items, ensuring that customers have access to comprehensive information about your offerings. To learn more, download our comprehensive step-by-stepguide.
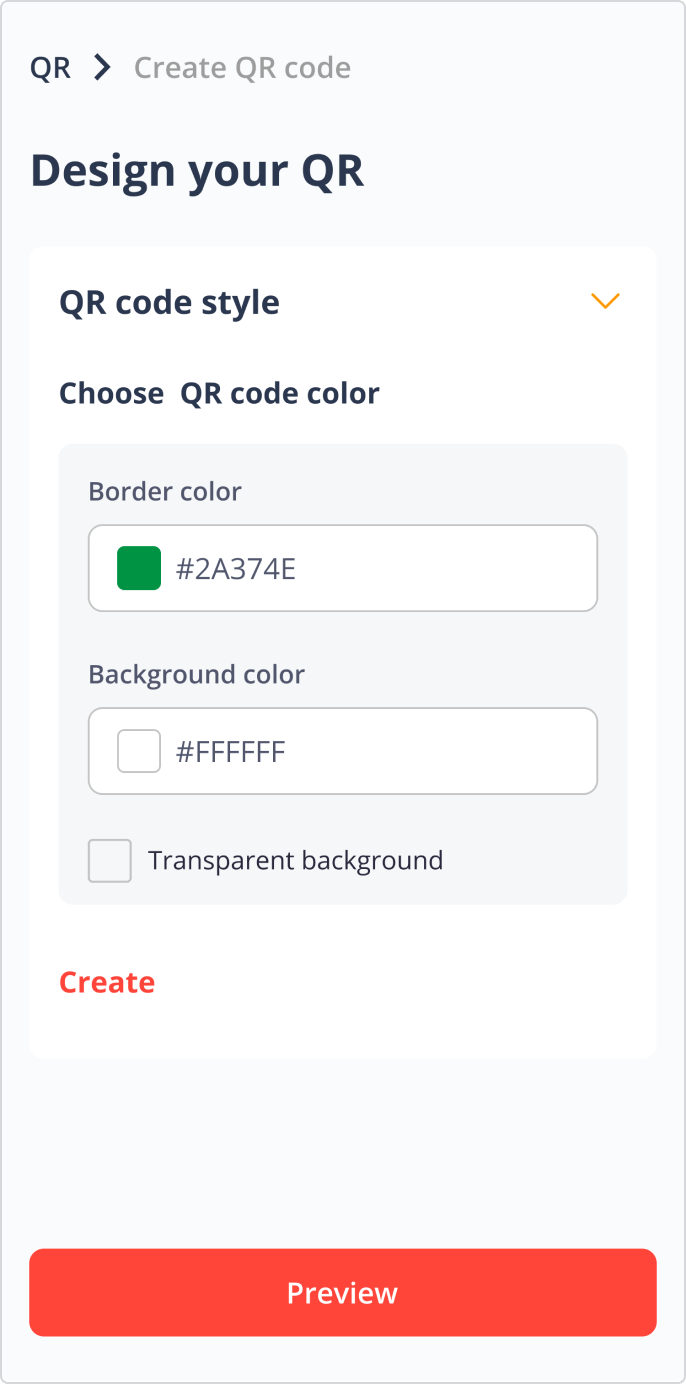
Generating QR Codes
Head to the QR Code section of your MenuMango account to generate QR codes for your menu. Here, you can choose the design and color scheme for your QR code to align with your branding. Activate the. "Set as Default" option if you want this QR code to be the primary one used for your menu. Ensure you complete all settings as required before uploading the QR code. Once everything is set up, proceed to upload the QR code to make it accessible to your customers for a seamless digital dining experience.
For further insights, download our detailedguidewith step-by-step instructions.
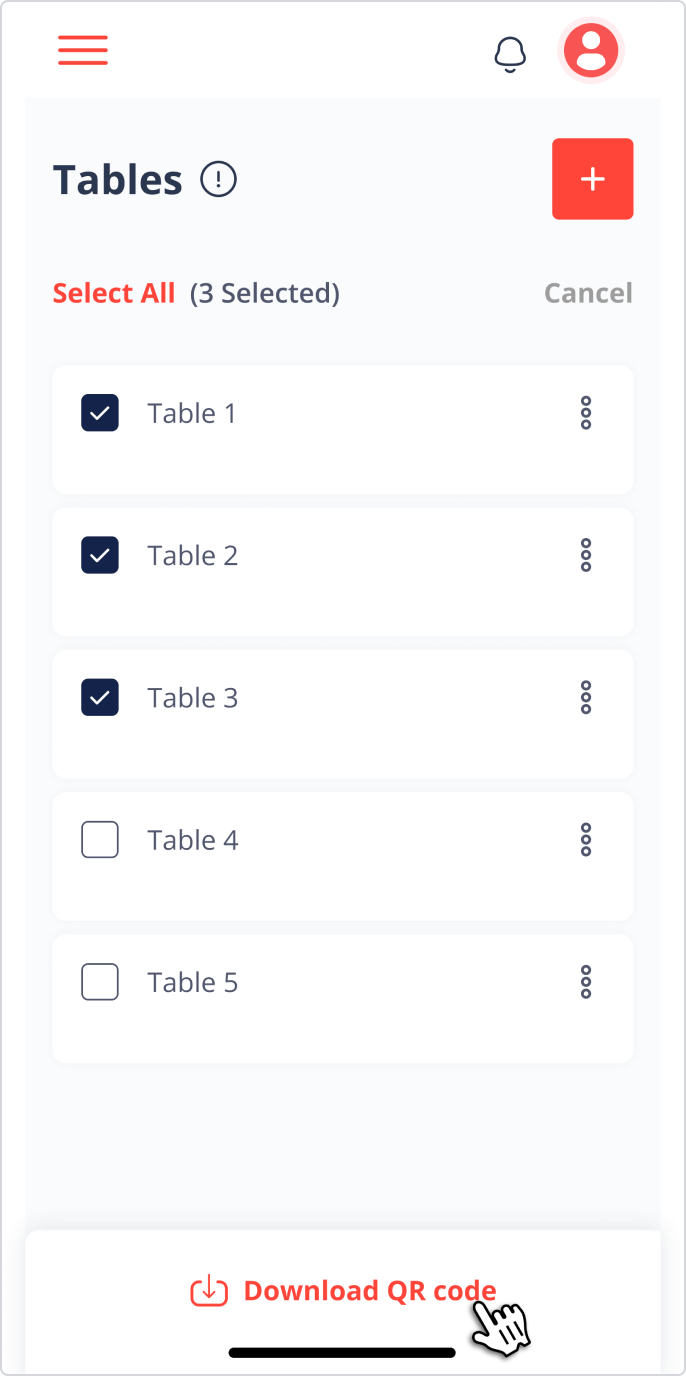
Downloading QR Codes
To download the QR code for your tables, begin by creating a table and entering the corresponding table numbers. Once the table setup is complete, proceed to download the QR code for printing or display.
This downloadable QR code allows customers to scan it with their smartphones, accessing your digital menu effortlessly.
To discover more, simply download our straightforwardguidewith step-by-step instructions.
FEEDBACK
Was this resource helpful?